Introduction
Applications need to be developed primarily with security in mind. A lot of things are involved but I will focus on two things in this blog post:
- We need to know which actors are using our system.
- We need to expose features only to users that need them, and have privilege to access them.
The first one deals with authentication – granting a user some sort of trusted credential (like an ID card). The second one deals with authorization – granting that credential a set of entitlements.
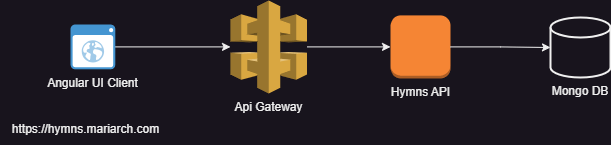
Architecture
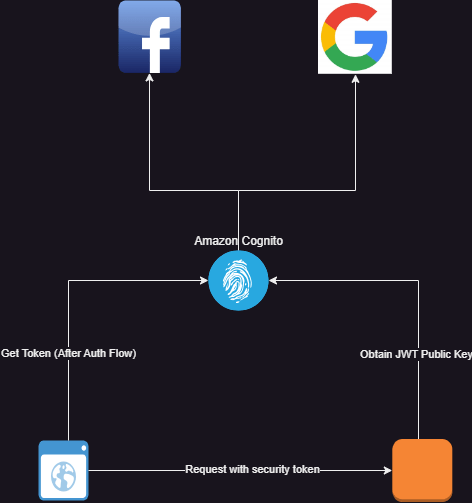
In the diagram below, we will be authenticating users through Amazon Cognito. Cognito will be configured to authenticate through three methods:
- Using local amazon user pools (users signing up though our app)
- Using facebook (users signing in through their facebook login)
- Through google (users accessing the app with their google account).
Standards
Like I stated in my earlier posts, it is important to design a security architecture that leverages standards so that it can be interoperable with other systems. We used the OpenID protocol. This made it easier to integrate using Angular Auth OIDC Client for the user interface and Spring Security Oauth2 library for the backend.
Authentication
How can we trust that the token passed to the backend service comes from the user instead of a malicious client? How do we identify the user from the token? How do we ensure that the right token is delivered to the client for use? How do we ensure that users have a good user experience when logging in to the application? These are the questions you need to ask yourself when designing an authentication system.
Gaining access to the System and Single Sign On (SSO)
We implemented authorization code grant flow using (PKCE) on the angular user interface. The authorization code grant type flow redirects login to the authorization provider (Amazon Cognito in this case). The login and signup forms are served by Amazon Cognito. This means that the user’s sign in and signup experience can be customized by changing the Cognito configuration. A few things can be achieved:
- Sign-in though external identity providers like Facebook, Google and other OpenID providers
- Sign-In through SAML providers.
- Enabling multi factor authentication according to the security requirements of your application.
- Configuring the session properties like access token validity period, session time, validity of refresh tokens and so on.
- Determining what user info is needed
- Styling the sign up and login pages.
Signing in through external identity providers help you to login to multiple applications without signing in. For example, once I have logged in to my google account, by clicking the google login, I do not need to enter my user name and password again. This approach provides a seamless way for users to access applications.
One of the major security vulnerabilities of the authorization code grant flow is that the code returned by the authorization server can be intercepted and a malicious actor can use that code to obtain an access token on behalf of the user. This is because public clients are normally used with authorization grant type and no client secrets are used. A common way to mitigate this is using Proof of Key for Code Exchange (PKCE). Most OpenID clients (including angular-auth-oidc-client) and authorization providers (in this case Cognito) support this. This method prevents interception because:
- Before the redirect is made to the authorization provider, the client generates two cryptographically related tokens: the code challenge and the code verifier.
- Only the client knows these token pairs and their relationship can be validated using cryptographic algorithms.
- The client adds the code challenge to the authorization request and the authorization server keeps track of the code challenge by associating it with the request along with the generated authorization code.
- The client is required to pass the authorization code and the code verifier in order to obtain the access token. Since only the client knows the verifier, no malicious user can obtain the token without the verifier.
- The authorization server validates the relationship between the challenge and the verifier using the selected cryptographic algorithms.
Benefits of using OpenID
In this application, the front end and backend strictly integrates with Amazon Cognito using the OpenID protocol. Because of this:
- I can reuse established open id libraries without re-inventing the wheel
- I have a solid foundation on the security flow since the protocol is well documented
- I can switch authentication providers and use others like Keycloak or Okta without implementation code changes.
Proof of Identity
Once the client makes a token request with a valid authorization code and code verifier, Amazon Cognito issues three tokens:
- An access token
- An identity token
- A refresh token.
These tokens are cryptographically signed by Cognito using public-key cryptography as per the OpenID standard using the JWT specification. In this specification:
- The authorization server maintains a key pair. A private key (kept secret by the authorization server) that it uses to sign generated tokens and a public key that it exposes for resource servers to retrieve.
- The client attaches the access token to a request.
- The resource server validates the request by validating the signature of the token using the public key.
In short, proof of identity is established based on trust. If the resource server can confirm that the token comes from the authorization server, then it trusts that information. The token is a JWT token that contains claims that identify the client. One of those claims is the username claim that contains the user id of the user.
Authorization
Once the identity of the actor has been established, the system needs to know the capabilities of the actor. What is this user allowed to do on this system? This is implemented in different ways in different systems. There are two aspects of authorization:
- Obtaining the user entitlements
- Enforcing the user entitlements
Both aspects can be taken care of by the same, or different authorization systems. Once practice I find useful is to de-couple authentication from authorization because you will, most likely, not use the same solution for both and you do not want to be tied down to a solution because you cannot isolate them in your logic.
In my case, I am only using Cognito for authentication. Cognito has a native integration with Amazon Verified Permissions which handles the above two aspects through authorization policy configuration and enforcement. Because I isolated both in my design, I am free to start with a much simpler authorization system using database based role-based-access control. In future, if I want to use something more elaborate like the Amazon Verified Permissions, I can easily integrate.
Like I said in the begining of the Authorization section, authorization behaviours fall into two categories:
- Those that handle 1 and 2 together, all you have to do is simply ask the authorization server the question “does the user have access to this resource?”
- Those that handle 1 and expect that you handle 2. They provide you with the list of the user’s entitlements and it is up to you to enforce that.
I am currently using the second approach, retrieving the user’s entitlement from the database.
Backend Authorization
Being a spring boot service, authentication and authorization are handled using spring security. I implemented a custom granted authority resolver. This is an implementation of spring’s Converter interface that converts a JWT token to a collection of granted authorities.
public class AppJwtGrantedAuthorityResolver implements Converter< Jwt , Collection<GrantedAuthority> > {

@Override
publicCollection<GrantedAuthority>convert(Jwtsource){
…
 }
}

}
Spring security already has APIs that help you to enforce access based on what entitlements the user has. So I can configure things like:
- Users can only have access to the GET ‘/hymns’ endpoint if they have the ‘hymns.view’ permission.
- Users can only have access to the POST ‘/hymns’ endpoint if they have the ‘hymns.create’ permission.
Front-end Authorization
Front-end authorization follows the same approach as backend but in this case, instead of restricting apis, we restrict the following:
- Access to pages on the app
- Visibility of components
- Functionality (enabling or disabling) of certain features or components.
These can be achieved in angular by:
- Implementing route guards
- Using entitlement based directives
- Using conditional statements applied to templates.
NOTE: It is advisable to implement both server and client size authorization.
Back to Amazon Verified Permissions
Amazon Verified Permissions is a user authorization service newly introduced by amazon that enables you to define flexible authorization rules that specify when and how much access a user has. These rules are defined using the open source Cedar language for specifying access control.
Like I said earlier in this post, as a resource server, you ask Amazon Verified Permissions if a user has access to the intended request. This service takes that authorization request, passes it though a set of rules you defined using the cedar language, and responds with an ALLOW or REJECT response.
This approach is extremely flexible and allows you to specify access rules based on any user and request criteria. Application teams can configure their access requirements in a manner that helps them efficiently manage access controls.
One drawback is that calls has to be made to the authorization API for every request and this can be costly and inefficient. This can be mitigated by:
- Caching the authorization decisions
- Batching authorization requests for multiple functionalities using the batch authorization API.
Secret Management
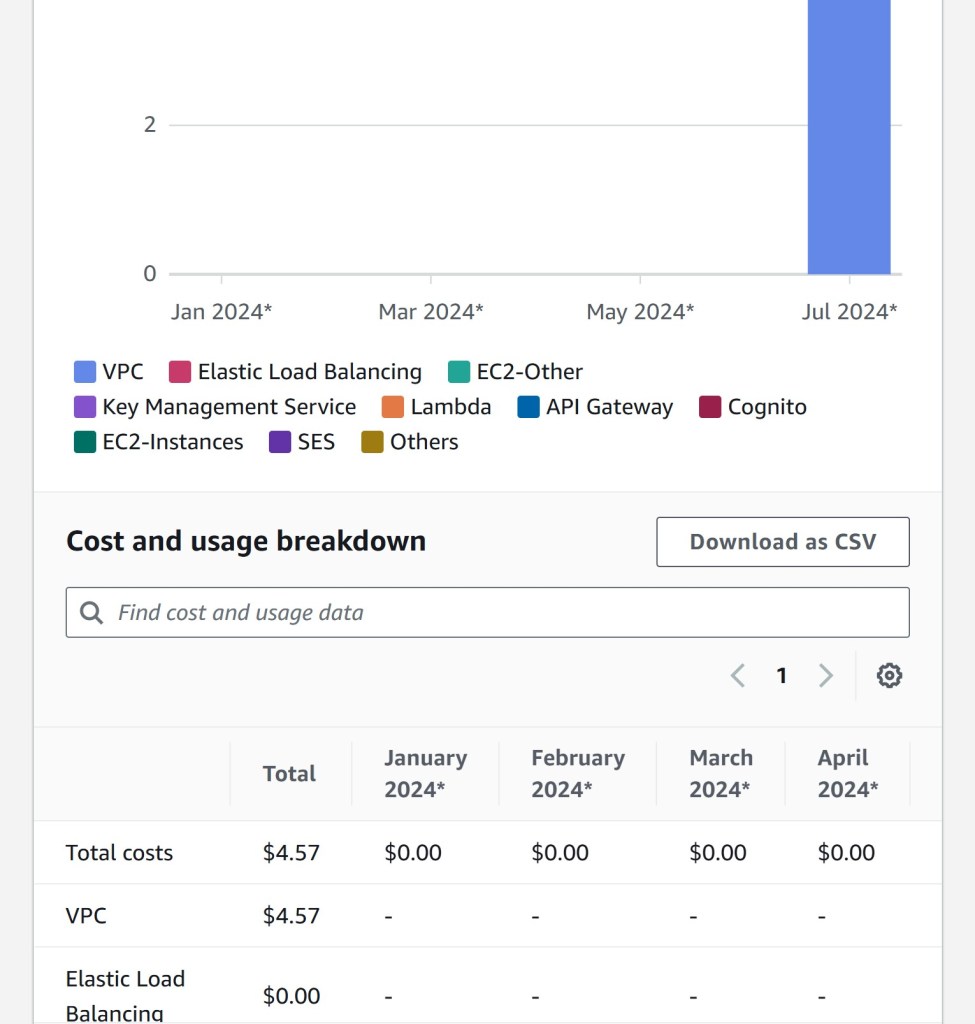
I cannot conclude without talking briefly about how to manage secrets. Database and private key credentials need to be stored securely to avoid malicious users gaining access to your system. The AWS Systems Manager provides a parameter store that enables you to store different parameters including secrets. This stores secrets as SecureStrings that are encrypted using the default AWS managed encryption key or a customer managed encryption key that you can manage. Encryption keys can be created using the Amazon Key Management Service.
Using the default AWS managed key is free, but you can only access the secret from within the account, using AWS APIs. If you need more flexibility and you want to share secrets with multiple AWS accounts, you will need to create a customer managed key, and of course, this is not free.